Homemade Bisquick is a versatile baking mix that you can make at home using simple ingredients. It’s a time-saving staple for whipping up pancakes, waffles, biscuits, and more.

This mix typically combines flour, baking powder, salt, and sometimes a bit of sugar. You can customize it by adding ingredients like powdered milk or shortening for extra richness.
Making your own Bisquick allows you to control the quality of ingredients and tailor the mix to your taste preferences. Plus, it’s budget-friendly and convenient to have on hand for quick and easy breakfasts or snacks.
Your family will love this recipe for several reasons. First, it’s incredibly versatile, allowing you to create a variety of delicious treats like fluffy pancakes, golden-brown waffles, and tender biscuits with minimal effort, The convenience of having this mix ready to go in your pantry means you can whip up a tasty breakfast or snack at a moment’s notice, bringing joy and satisfaction to your family’s taste buds time and time again.
Ingredients for Homemade Bisquick Substitute
This recipe is made with ingredients already in your pantry! No need to waste money on a premade blend!
** You can find the full recipe ingredients and instructions on the printable recipe card below.
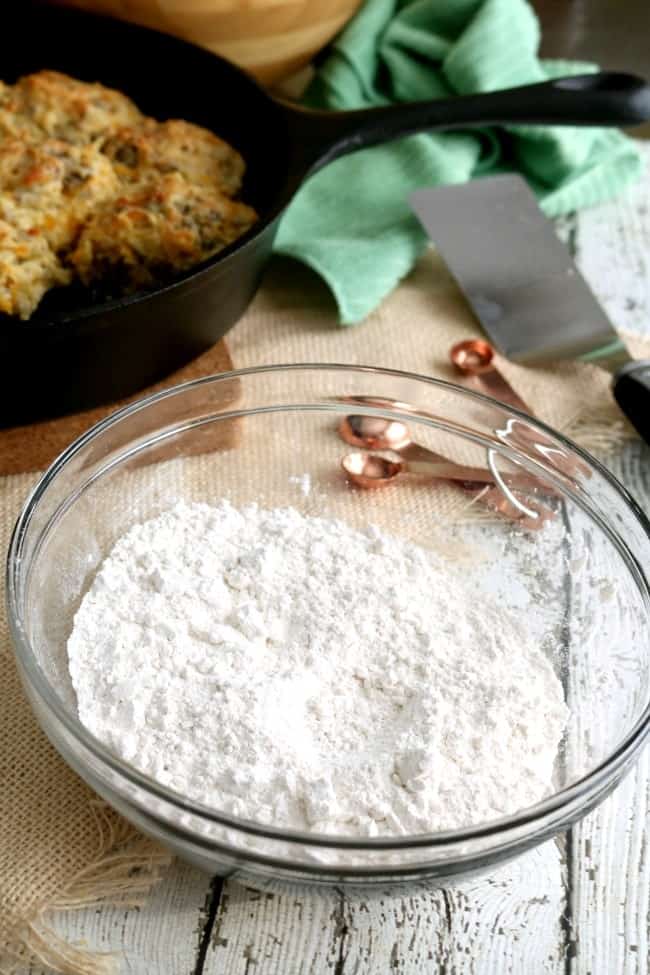
- All-purpose flour: This is the base ingredient for the mix. It provides the structure and bulk to your baking mix.
- Baking powder: Baking powder is a leavening agent that helps your baked goods rise. It creates air bubbles in the batter, resulting in a light and fluffy texture.
- Salt: Salt enhances the flavor of the baked goods. It also helps to strengthen the gluten in the flour, improving the structure of your baked goods.
How to make Homemade Bisquick
Making homemade Bisquick is one-bowl-easy!
** You can find the full recipe ingredients and instructions on the printable recipe card below.
- Just mix all these ingredients until well combined, and there you have it – your own homemade Bisquick! You can use this mix for pancakes, waffles, biscuits, and more.
Why this recipe works
This homemade Bisquick recipe is the ultimate family-friendly meal solution. Its simplicity allows for quick preparation, ideal for busy weeknights or lazy weekends. With versatile applications, from pancakes to biscuits, it caters to everyone’s preferences. Plus, by using common pantry staples, it’s budget-friendly and accessible.
Recipe tips and kitchen tricks
- Adjust Consistency: Depending on the recipe, you may need to adjust the consistency of your batter or dough. If it’s too thick, add a bit more liquid (such as milk or water). If it’s too thin, sprinkle in a little more homemade Bisquick until you reach the desired consistency.
- Customize Flavors: Get creative with flavor variations by adding ingredients like vanilla extract [paid link], cinnamon, or grated cheese to your homemade Bisquick mix. These additions can elevate the taste of your baked goods and add a personal touch to your recipes.
- Storage: Store your homemade Bisquick mix in an airtight container in a cool, dry place. This will help prolong its shelf life and maintain its freshness. Label the container with the date you made the mix so you can keep track of its freshness. If properly stored, homemade Bisquick can last for several months.
Recipe Variations
- Blueberry Pancakes: Stir fresh or frozen blueberries into the pancake batter made with homemade Bisquick before cooking. Cook as usual on a hot griddle until golden brown. Serve with maple syrup for a delicious breakfast or brunch treat.
- Cheesy Garlic Biscuits: Add shredded cheddar cheese and minced garlic to the homemade Bisquick mix before adding the liquid. Mix until just combined, then drop spoonfuls of dough onto a baking sheet. Bake according to the biscuit recipe instructions until golden brown. Brush with melted butter mixed with garlic powder and parsley for extra flavor.
- Cinnamon Sugar Waffles: Sprinkle cinnamon sugar onto the waffle iron just before adding the homemade Bisquick batter. Cook the waffles according to the waffle iron’s instructions until crispy and golden brown. Serve warm with a drizzle of maple syrup or a dollop of whipped cream for a delightful dessert or indulgent breakfast.
Serving Suggestions
- Pancakes with Fresh Fruit: Serve homemade Bisquick pancakes topped with a variety of fresh fruits such as strawberries, blueberries, raspberries, or sliced bananas. Drizzle with maple syrup or honey for added sweetness.
- Biscuits and Gravy: Pair homemade Bisquick biscuits with creamy sausage gravy for a comforting and hearty breakfast or brunch option. Garnish with chopped parsley or green onions for a pop of color and freshness.
- Waffles with Whipped Cream: Top homemade Bisquick waffles with a generous dollop of freshly whipped cream and a sprinkle of powdered sugar. Add a side of crispy bacon or sausage links for a savory contrast to the sweet waffles.
- Cheese and Herb Biscuit Sandwiches: Use homemade Bisquick biscuits as the base for breakfast sandwiches. Fill them with scrambled eggs, crispy bacon or sausage patties, and melted cheese. Add a dash of hot sauce or ketchup for extra flavor.
- Fried Chicken and Biscuits: Serve homemade Bisquick biscuits alongside crispy fried chicken for a classic Southern-inspired meal. Drizzle the chicken with honey or hot sauce for a sweet and spicy kick. Pair with coleslaw or mashed potatoes for a complete and satisfying dinner.
Storing, freezing, and reheating instructions
Storing:
- Store any leftover dishes made with homemade Bisquick in an airtight container or sealed plastic bag.
- Keep them in the refrigerator for up to 3-4 days to maintain freshness.
Freezing:
- To freeze dishes like pancakes, waffles, or biscuits made with homemade Bisquick, first, allow them to cool completely.
- Once cooled, place them in a single layer on a baking sheet and freeze until solid.
- Transfer the frozen pancakes, waffles, or biscuits to a freezer-safe bag or container, removing as much air as possible before sealing.
- Label the bag or container with the date and store in the freezer for up to 2-3 months.
Reheating:
- To reheat frozen pancakes or waffles, simply pop them in the toaster until warmed through and crispy.
- For frozen biscuits, preheat the oven to 350°F (175°C), place them on a baking sheet, and bake for 10-15 minutes or until heated through.
- Alternatively, you can reheat pancakes, waffles, or biscuits in the microwave for 30-60 seconds until warm.
- Enjoy your reheated dishes with your favorite toppings or accompaniments.
Frequently asked questions (FAQs)
Can I substitute homemade Bisquick for store-bought Bisquick in recipes?
Yes, you can typically substitute homemade Bisquick for store-bought Bisquick in recipes. Just use it in the same quantity as called for in the recipe.
How long does homemade Bisquick last?
When stored in an airtight container in a cool, dry place, homemade Bisquick can last for several months. Be sure to check for any signs of spoilage, such as a rancid smell or off-color.
Can I make gluten-free homemade Bisquick?
Yes, you can make gluten-free homemade Bisquick by using a gluten-free all-purpose flour blend. Just ensure that all other ingredients used are also gluten-free.
Can I make dairy-free homemade Bisquick?
Yes, you can make dairy-free homemade Bisquick by using a dairy-free fat option such as vegetable oil or dairy-free margarine.


Bisquick Substitution
Ingredients
- 1 cup all-purpose flour
- 1 1/2 tsp baking powder
- 1/4 tsp salt
- 1 tbsp shortening , vegetable oil or melted butter
Instructions
- with two forks or a pastry blender [paid link], mix the ingredients well until small pea sized pebbles form.
- Use cup for cup in any recipe that requires Bisquick or a similar baking mix.

Recipe of ingredients is nice, but your nutrition information is very misleading. You show zero sodium and that simply is not true – 1 1/2 tsp of Baking Powder has about 732 mg of sodium and 1/4 tsp of salt has about 581 mg. of sodium. That amounts to 1,313 mg of sodium for your recipe – a serious problem for all those of us on restricted sodium diets.
Hi Joe,
Looks like the whole nutritional value was missing, it also showed 0 carbs… I have fixed the calculations and it’s been updated to reflect per cup of mix. Keep in mind you’d have to eat an entire cup of it to consume those values. Thanks for letting me know that was miscalculated.
sodium is still incorrect; I didn’t check anything else; Joe was accurate; 1313 per the full 1 cup recipe
Hello Joe and Susan,
I hope you are well. I took a look at the automatic calculating software in the recipe card. Indeed, it shows an error in the calculation of sodium in the baking powder (5.4 instead of 540 for 1/2 tsp). I updated this recipe with an approximate value for sodium. This will also vary by the brand you purchase. I have reached out to the app publisher to see if I can get this corrected.
This homemade Bisquick recipe rocks, and taste much better
This Bisquick recipe was so easy and tasted so much better. Ty
Tysm, these were so easy to make and much better tasting then bisquick
thanks for the recipe. I also never keep bisquick and so many recipes call for it.
Perfect! Thanks. I never buy bisquick so I’m always at a loss with this
I never keep bisquick so I was happy to find this recipe.