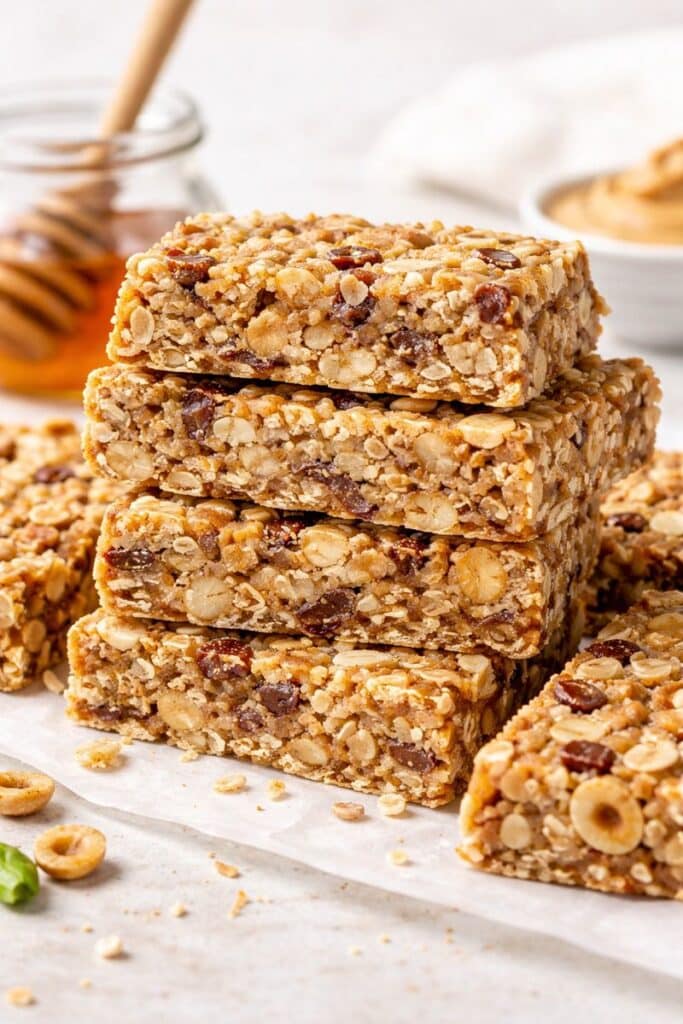
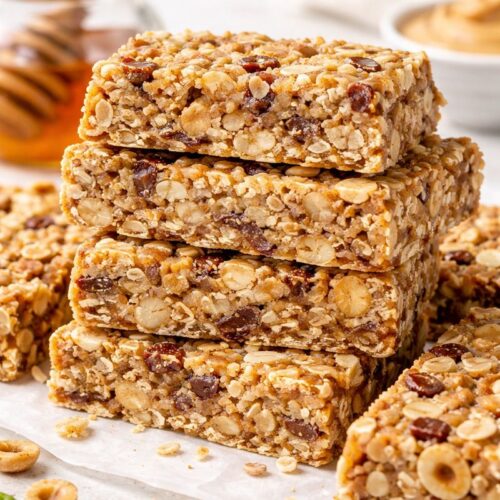
These no-bake granola bars offer a balanced combination of carbohydrates, healthy fats, and protein, making them a satisfying snack that actually keeps you full. The peanut butter provides protein and healthy fats, while oats and cereal contribute fiber for sustained energy. Dates and honey add natural sweetness without refined sugar, making these bars a smarter choice than many store-bought options.
Because they are made with whole ingredients, these homemade granola bars are easy to adapt to your dietary needs while still feeling indulgent.
Why This Recipe Works
- No baking required – perfect for warm days or quick prep
- Simple ingredients you likely already have on hand
- Naturally sweetened with honey
- Customizable for different tastes and dietary needs
- Freezer-friendly for grab-and-go snacks
Ingredients
** You can find the full recipe ingredients and instructions on the printable recipe card below.
- Granola
- Ancient grains cereal (with almonds & dates)
- Honey Nut Cheerios
- Unsweetened toasted coconut
- Sliced almonds
- Chopped dates
- Creamy peanut butter
- Honey
- Vanilla extract [paid link]
- Salt
- Non-stick cooking spray (or parchment/foil for lining)

Instructions
** You can find the full recipe ingredients and instructions on the printable recipe card below.
- Prepare a square baking pan with non-stick spray or line with foil/parchment.
- In a small saucepan [paid link], gently warm the peanut butter, honey, vanilla, and salt until smooth and pourable.
- In a large bowl, combine all dry ingredients.
- Pour the warm peanut butter mixture over the dry ingredients and stir until evenly coated.
- Press the mixture firmly into the prepared pan.
- Refrigerate or freeze until fully set, then slice into bars.

Why Homemade Granola Bars Are Better Than Store-Bought
Making granola bars at home allows you to control the ingredients and avoid unnecessary additives. Many packaged granola bars contain preservatives, artificial flavors, or excess sugar. These no-bake granola bars use simple pantry staples and can be customized to fit your preferences.
Homemade bars are also more cost-effective and can be portioned exactly how you like, whether you prefer snack-sized squares or larger breakfast bars.
Perfect Occasions to Make These Granola Bars
No-bake granola bars are ideal for:
- Weekly meal prep.
- School lunches and after-school snacks.
- Road trips and travel days.
- Busy mornings when cooking is not an option.
- Post-workout snacks that do not feel heavy.
Because they store well in both the refrigerator and freezer, they are a dependable snack to keep on hand at all times.
Tips for Cutting Clean, Even Bars
For neat slices, allow the bars to chill completely before cutting. Using a sharp knife warmed under hot water and wiped dry between cuts helps prevent sticking. Lining the pan with foil or parchment paper [paid link] also makes it easier to lift the bars out in one solid piece, ensuring cleaner edges.
If you prefer softer bars, let them sit at room temperature for a few minutes before slicing.
How to Customize for Different Diets
These no-bake granola bars are easy to adapt:
- Gluten-Free: Use certified gluten-free granola and cereal.
- Dairy-Free: This recipe is naturally dairy-free.
- Vegan: Swap honey for maple syrup or agave.
- Nut-Free: Replace peanut butter with sunflower seed butter and omit almonds.
These simple swaps allow you to serve the same recipe to different households or dietary needs without making separate batches.
Variations
- Nut-Free: Use sunflower seed butter and omit almonds
- Chocolate Lovers: Add mini chocolate chips once the mixture cools slightly
- Fruit Swap: Replace dates with dried cranberries, cherries, or raisins
- Extra Protein: Stir in a scoop of vanilla protein powder
- Different Flavor: Try almond butter or cashew butter instead of peanut butter
What to Serve With No-Bake Granola Bars
These bars are great on their own, but they also pair well with:
- Fresh fruit
- Yogurt
- A smoothie
- Coffee or tea for an easy breakfast
People Often Ask (FAQs)
Do these granola bars hold together well?
Yes—pressing the mixture firmly into the pan and allowing enough chill time is key.
Can I use a different sweetener?
Maple syrup works, though the bars may be slightly softer.
Are these gluten-free?
They can be, as long as all cereals and granola used are certified gluten-free.
Can I reduce the sweetness?
Yes—use slightly less honey or choose an unsweetened granola.
Make-Ahead & Storage Tips
- Store bars in an airtight container in the refrigerator for up to 7 days.
- For longer storage, wrap individually and freeze for up to 3 months.
- Let frozen bars sit at room temperature for a few minutes before eating.
Final Thoughts
These no-bake granola bars are one of those recipes you will reach for again and again. They are quick to make, endlessly customizable, and perfect for real life when time is short but good food still matters. Whether you enjoy them for breakfast, pack them for snacks, or keep them in the freezer for emergencies, they deliver convenience without sacrificing flavor or texture.
Once you try them, you may never go back to store-bought granola bars again.


No-Bake Granola Bars
Equipment
- 9-inch x 9-inch square baking pan, freezer safe
- Saucepan [paid link]
Ingredients
- 1 1/2 cups your favorite granola blend
- 1 cup Ancient grains cereal with almonds and dates
- 1 cup Honey Nut Cheerios
- 1/4 cup coconut unsweetened, toasted
- 1/2 cup almonds sliced
- 1/2 tsp vanilla extract [paid link]
- 1/4 tsp salt
- 1/2 cup creamy peanut butter I prefer honey roasted
- 1/2 cup honey I use raw, unfiltered
- 1/4 cup dates chopped
- non-fat cooking spray
- aluminum foil optional
Instructions
- Prepare a 9×9″ pan with cooking spray and line with a strip of aluminum foil. This makes it easier to remove the granola from the pan later on to cut into cubes or bars.
- In a small saucepan [paid link], combine the salt, vanilla, honey and peanut butter. Heat until the peanut butter melts, stirring often.
- Meanwhile, in a large bowl, combine the cereals, coconut, almonds and dates; mix to combine.
- Pour the peanut butter mixture into the cereal mixture and stir well to combine.
- Pour the mix into the prepared pan and press down firmly into the pan. If the granola is not pressed firmly, it will crumble later on instead of forming bars.
- Freeze for a 2 hours or overnight to set.
- Remove from the freezer and cut into bars or squares.
Nutrition
More Recipes You’ll Love
If you love No-Bake Granola Bars, you might also enjoy more recipes from our Breakfast collection.
Looking for even more ideas? Browse our full set of recipe group boards to find your next favorite meal.
Save this recipe for later


The kids liked these a lot and it was minimal work